This blog was written by Akshat Gupta an Agora Superstar. The Agora Superstar program empowers developers around the world to share their passion and technical expertise, and create innovative real-time communications apps and projects using Agora’s customizable SDKs.
Introduction
Transcription or closed-captioning has become a very common feature in most video conferencing applications.
This service is useful not only for people with impaired hearing but also for other situations. For example, transcribed text can be read when audio cannot be heard either because of a noisy environment (such as an airport) or because of an environment that must be kept quiet (such as a library).
For students, this service can be useful for taking notes. Especially when students are falling behind in class, the transcription feature can help students to catch up the progress.
Because of its benefits, several video calling giants have incorporated this feature into their applications, including Microsoft Teams, Google Meet, Zoom, and Skype.
In this tutorial, we will develop a web application that supports speech-to-text transcription using JavaScript’s Web Speech API, the Agora Web SDK, and the Agora RTM SDK.

Prerequisites
- Basic knowledge of how to work with JavaScript, JQuery, Bootstrap, and Font Awesome
- Agora account (How to Get Started with Agora)
- Know how to use the Agora Web SDK and the Agora RTM SDK
Project Setup
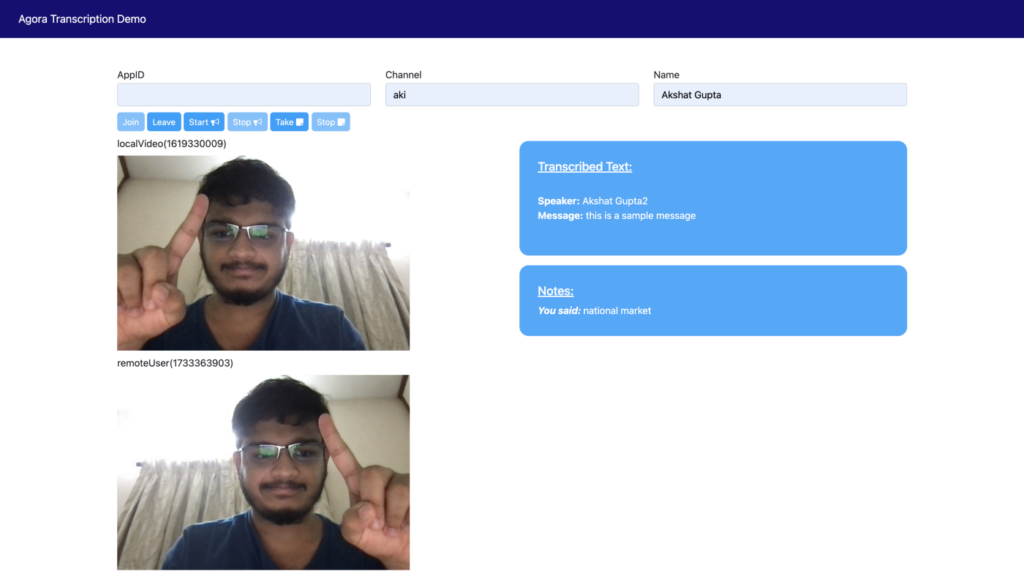
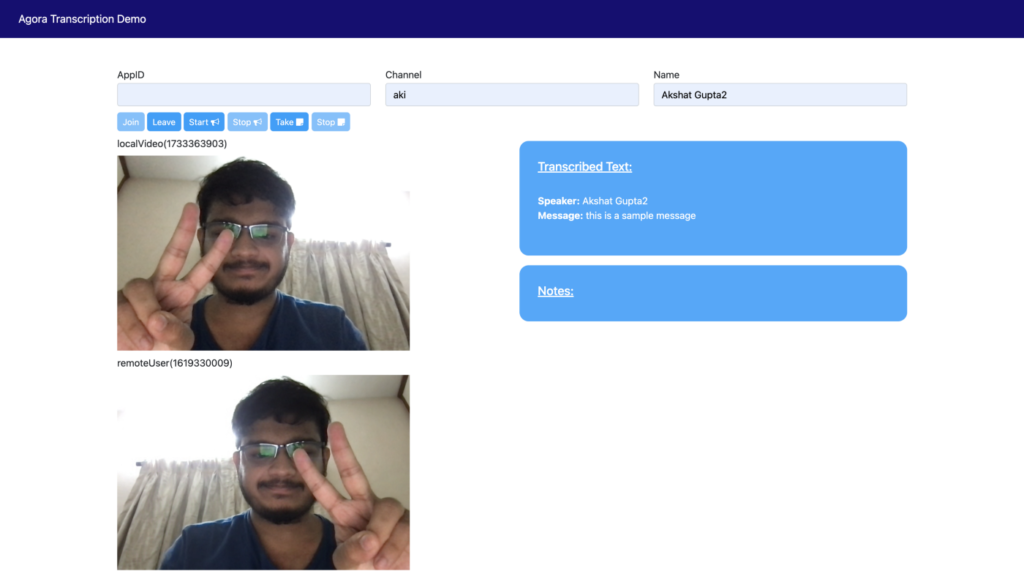
Let’s start by laying out our basic HTML structure. A few UI elements are necessary, such as the local video stream, the remote video streams, buttons to join or leave the call, and buttons to start or stop recording the user's voice.
I have added a few input fields for the App Id, channel name, and username above the div containing the video containers and the transcription output boxes. I’ve also imported the necessary CDNs and linked the custom CSS and JS files:

If you are not familiar with setting up a video call with Agora Web SDK, see this tutorial.
Adding Color
Now that our basic layout is ready, it’s time to add some CSS.
I’ve already added basic Bootstrap classes to the HTML to make the site presentable, but we’ll use custom CSS to match the site with a blue Agora-based theme:


Core Functionality (JS)
Now that we have the HTML/DOM structure laid out, we can add the JS, which uses the Agora Web SDK. It may look intimidating at first, but if you follow Agora’s official docs and demos and put in a little practice, it’ll be a piece of cake.
We first create a client (line 2)and specify the audio and the video tracks. When a user joins (line 43)a channel by clicking the button, the user’s stream is subscribed (line 91) and published (line 112).
Finally, we give the user an option to end the stream and leave (line 79) the channel:
Adding Voice-to-Text Services
Now that we have the core video calling functionality implemented, we can add the JS for transcription and note-making, which uses the Web Speech API to recognise speech, as well as the JS to send the transcribed text to all users in the channel using RTM. If you follow this article to explore the functions in the Web Speech API and Agora’s official docs for RTM, you’ll be able to follow along without any difficulty.
We initialise the Web Speech API (lines 2 and 3) and set default global variable values. On button clicks for note-making (line 11), the transcribed text is automatically shown (line 31) to the user.
To send the same transcribed text to all other users in the channel, we use RTM to send messages consisting of the transcribed content.
We first log in (line 53)to the RTM client once it is initialised and send messages (line 82) to all connected users in the channel with new transcribed content.
We use the ChannelMessage callback (line 97) to receive and display the received message content:
You can now run and test the application.


Note: For testing, you can use two or more browser tabs to simulate multiple users on the call.
Conclusion
You did it!
We have successfully made our very own transcription and note-making service inside a web video call application. In case you weren’t coding along or want to see the finished product all together, I have uploaded all the code to GitHub:

You can check out the demo of the code in action:

Thanks for taking the time to read my tutorial. If you have questions, please let me know with a comment. If you see room for improvement, feel free to fork the repo and make a pull request!


