Augmented reality (AR) has seen many recent gains in popularity, and as headset makers work to keep up with hardware demand, developers are working to keep up with users’ need for engaging content.
AR, however, is not the only technology that has seen an increase in popularity. In today’s professional world, everyone is using live video streaming to connect and collaborate. This creates an exciting opportunity for developers to build applications that leverage Augmented Reality and video streaming to create a rich and immersive experience that removes distance barriers.
AR developers face two unique problems:
- How do you make AR more inclusive and allow users to share their POV with people who are not using AR headsets?
- How do you bring non-AR participants into an AR environment?
Magic Leap recently released the Magic Leap 2 (ML2) with some amazing new features, including compatibility with Agora and the ability to use the on-device camera and mic to capture the user’s voice and their visual perspective and broadcast it to a remote user. This could be helpful for collaborative work, remote assistance, education, social, and many more use-cases.
In this guide, I am going to walk you through building an Augmented Reality application using Unity that allows users to live stream their AR perspective from an ML2 device. We will also add the ability to have non-AR users live stream themselves into the virtual environment using their web browser.
We will build this entire project without writing any code.
This guide will focus on implementing the Agora video prefabs for initializing the Agora engine, setting up token authentication, and connecting the video and mic inputs from the ML2 head-mounted display (HMD).
Prerequisites
- Have a physical ML2 HMD
- Registered as a Magic Leap developer
- Have the ML2 Unity development environment set up by following the official documentation
- Registered as an Agora developer
Part 1: Build a Unity XR App
After setting up the Unity development environment for MagicLeap 2, you should be able to find the ML2 Unity examples project from the tools directory of the MagicLeap folder:
Launch the project from Unity 2022.2. Follow the Getting Started instructions to build, deploy, and test the UnityExamples App.
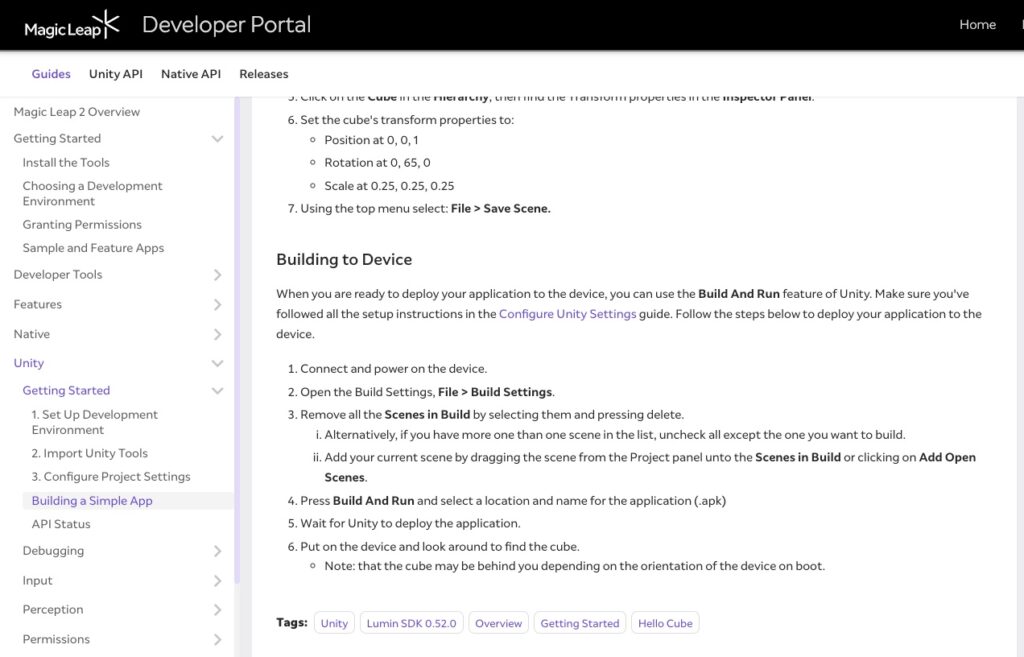
Congrats if you have successfully played with a cube in the Augmented Reality from ML2! We will continue the steps in this demo to bring in Agora live streaming plugin.
Part 2: Import Agora Plugin
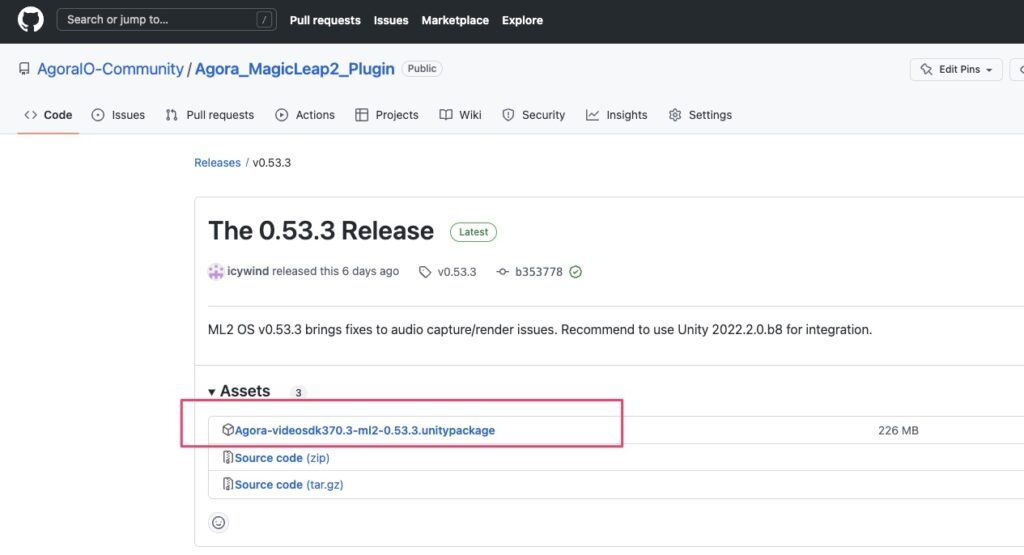
Go to Agora’s GitHub releases section and download the latest plugin package.
From the Unity Editor menu, select Assets > Import Package > Custom Package…, and select the Agora Unity package you just downloaded. After several seconds of decompression time, the Unity dialog shows up with the contents of the package. Click Import to import the contents into the project.
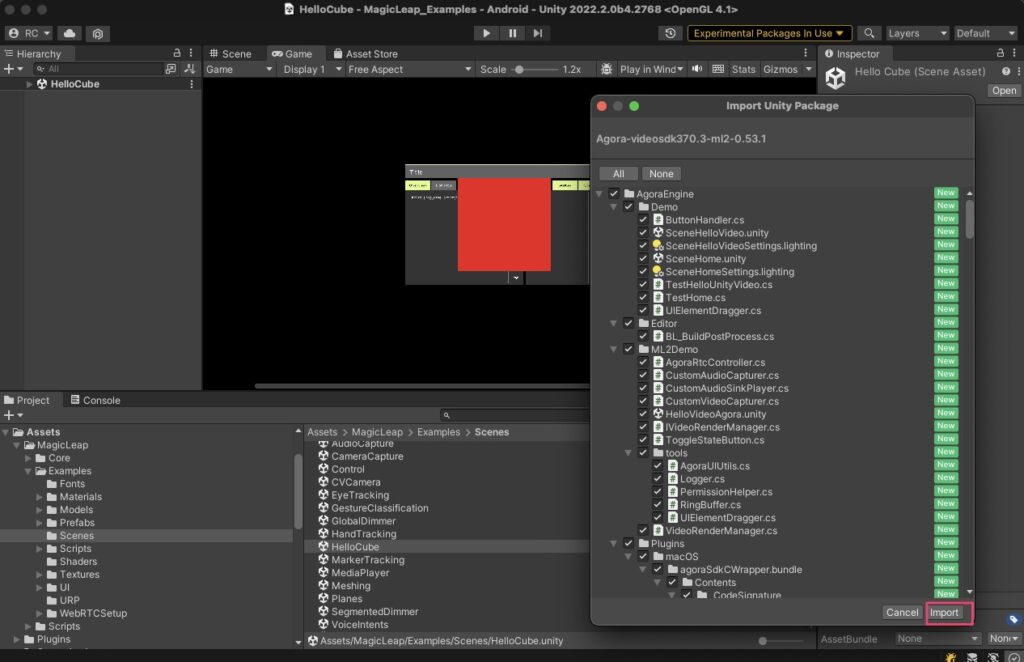
You will find a new folder named AgoraEngine in the Assets root folder.
Part 3: Set Up a New Scene
Step 1 – Scene
We will use the Agora plugin on the HelloCube scene. To preserve the original examples, first duplicate the HelloCube scene (Mac: Cmd+D, PC: Ctrl+D), then rename the scene to TestAgora. You can move the TestAgora scene to a different work folder. In this exercise, we will create a work folder named AgoraTest and move the TestAgora scene there. Delete the Cube object from Hierarchy.
Step 2 – User Interfaces
SpawnPoint
Create a game object under the [UI]> UserInterface hierarchy. Position it at (-314,475,0), assign it the width of 100 and the height of 200.
Buttons
Create three legacy buttons under the [UI]> UserInterface hierarchy, label them MuteLocalButton and MuteRemoteButton accordingly. In the Unity Inspector, add a new component called Toggle State Button to each of these buttons. The button attributes should be set according to the following table:
Note that it is not necessary to enforce these values. Feel free to change them, if necessary.
Log Text
Create a Legacy Text UI, label it Log Text, then position it at (-200, -60, 0). Assign it the width of 295 and the height of 280.
The design of the UI should now look like this:

Step 3 – AgoraController
Navigate to Assets > Agora_MagicLeap2_Plugin > AgoraEngine > Prefabs and drag the AgoraController prefab into the Hierarchy.
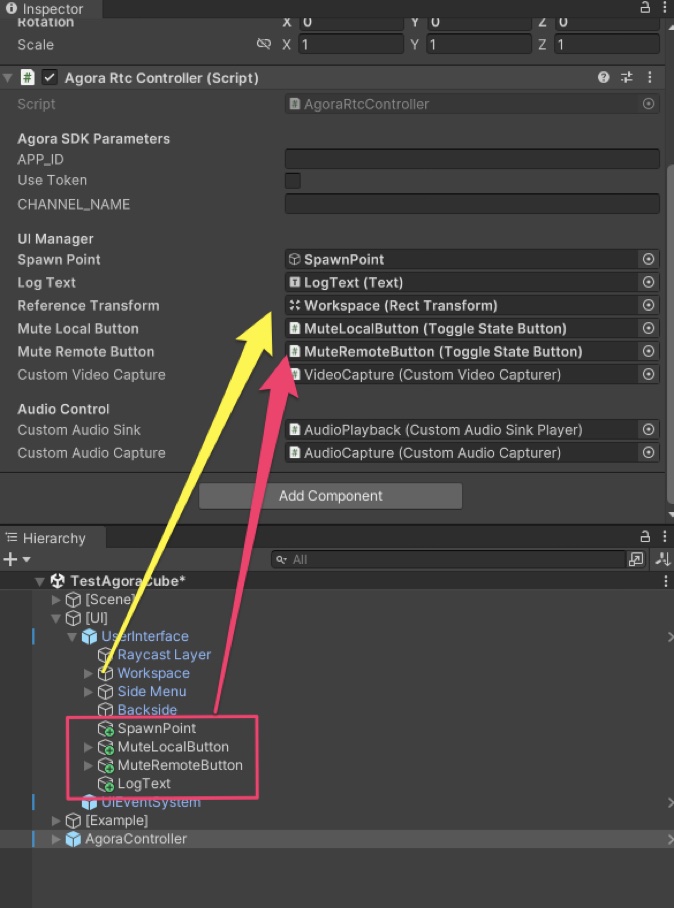
Connect the UI objects from the previous step into the fields of AgoraController accordingly. Use Workspace as reference for the rotation values and set it to the ReferenceTransform field.
See this picture:
Step 4 – App Parameters
Agora SDK Parameters
The App_Id field requires an ID of an Agora project. If you have not yet created a project, simply log into your Agora developer account, go to the Project Management page, create a new project, and choose the Testing Mode App ID for now. We will go through the token part in the later steps.
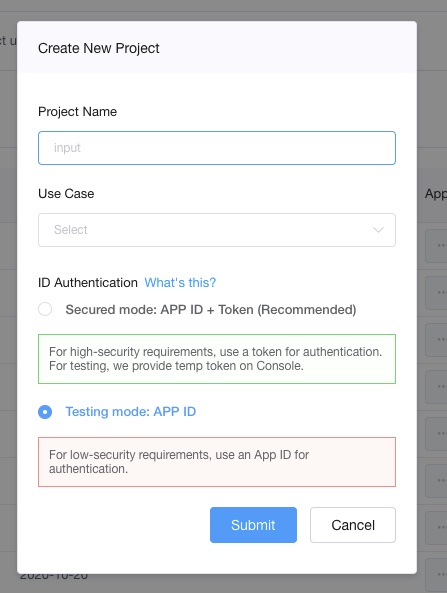
Copy the App ID that you have just created and paste it into the App_ID field in the Unity Inspector. Leave Use Token unchecked. Enter your channel name for the test, for example, ML2Test.
MagicLeap 2 parameters
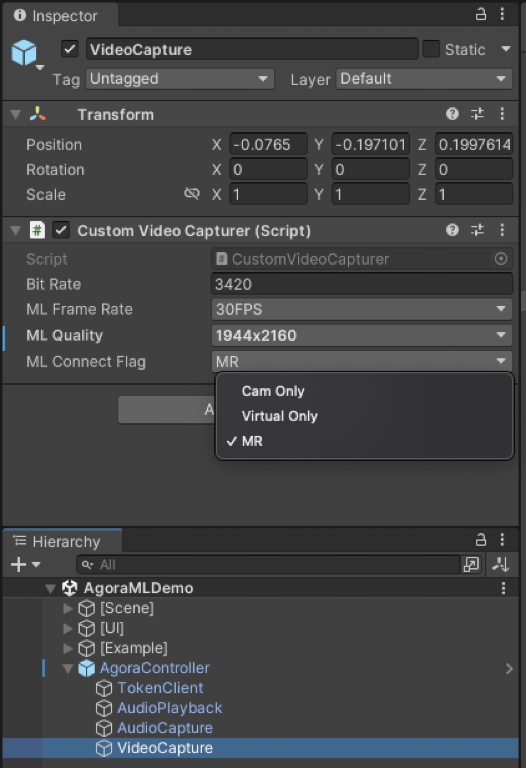
ML2 parameters include a vast selection of camera parameters. From the Editor Hierarchy, expand the AgoraController object and select the VideoCapture object. Here you can make choices in the Framerate, Quality (Resolution), and Mixed Reality modes. In this example, we chose 30FPS for the framerate, 1944×2160 for the resolution, and Mixed Reality (MR) for the camera stream. For the bitrate, it should be adjusted to accompany the frame rate and resolution. Agora provides a table with recommended values.
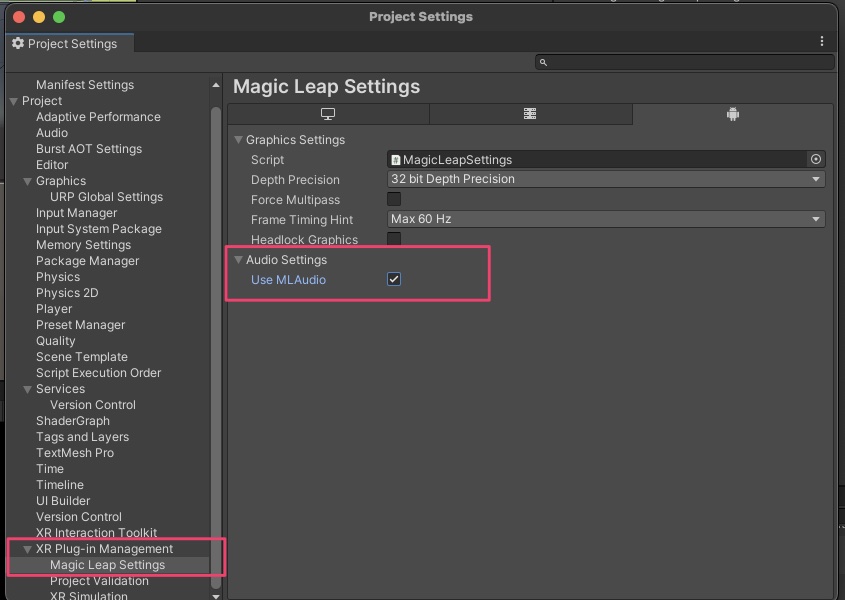
Just one last setting in the Unity Editor to check – make sure that the Use ML Audio is checked in Project Settings.
After these steps, the scene is basically set up. And we are ready to run the test!
Part 4 – Live Streaming Test
Build and deploy
Since the example project has already been set up when imported, there will be no extra configuration. Add the new scene to the Scenes to Build list in the Build Settings and remove the other existing scenes. Connect the ML2 headset and click Build and Run. After several minutes of build and deployment time, you should see the test app running on your headset!
Important note: Since video camera streaming is a mutually exclusive feature on ML2, you can either broadcast video using the Agora plugin or use the Device Stream feature in ML Hub one at a time.
Remote test users
Since we are testing a Real-time Communication (RTC) application here, we want to connect to remote users and test the streaming both ways in the ML2 view. Agora supports cross-platform communications. An experienced Agora developer may have already built an RTC app on another platform that runs the same App ID. For a quick test, you can just use the Basic Video Call web demo from Agora to see both the local desktop user and the ML2 user streaming. Note that this web demo does not render video by the actual aspect ratio from the stream. Therefore, you can only see a cropped video frame here, even though you may have chosen a portrait ratio to send. It is still good enough to check what the stream contains. As you can see, my local camera view is shown on the top and the remote ML2 view is at the bottom. Users can easily observe what you are doing in the ML2 Mixed Reality environment!
Yay! Super easy, isn’t it?
Part 5: Token Security
Token authentication is optional but important to have in a production environment. Agora provides detailed information about this concept, as well as sample scripts for various server framework/languages. A one-click deployment server project is available on GitHub. Thus, we will skip the details for the server and focus on the client side. In the ML2 Agora Unity plugin, a TokenClient prefab is included to handle all the logic with the server. To use it, go to the AgoraController prefab, check Use Token, and enter the token server information on the TokenClient object:


After these configuration steps, run the test again and make sure the token client/server environment works with the application on both sides of users. That’s it!
Conclusion
This no-code project shows how easily you can bring a POV project to live for both AR and non-AR users. For any questions or issues, please raise them at the issues page or the discussion forum at Magic Leap. Happy coding!


