Author: Kofi Ocran. I am a software engineer who builds products and services with web technologies. I occupy the sweet spot between software engineering and data science and learn more by sharing my knowledge through technical articles.
Flask is a micro web framework written in Python. It is mostly used to build API endpoints, but it can be extended to build fully fledged applications. We are going to build a one-on-one video calling application with Flask using the hassle-free Real-Time Engagement platform with Agora.
Previously, I built a video chat app with WebRTC and Laravel and wrote a blog about it here: Adding Video Chat To Your Laravel App. WebRTC is one of the ways through which you can implement video chat features. Companies like Agora provide a fully packaged video chat SDK to provide a high-quality Real-Time Engagement video chat experience. As someone who has WebRTC development experience, I can tell you there are some limitations with WebRTC, such as:
After my experience with the Agora platform, I concluded it was not worthwhile for a company to invest a lot of development hours into building a video call feature as part of their main application with WebRTC. Agora will save you a lot of development hours. Through this article, I’m going to show you how to quickly build a video call application in Flask with Agora.
After building a video chat app with Agora, I want to highlight some of the advantages:
1. Create and activate a Python 3 virtual environment for this project.
2. Open your terminal or command prompt and navigate to the starter project you downloaded as part of the prerequisites. The folder is named agora-flask-starter.
3. Follow the instructions in the README.md file in the agora-flask-starter folder to set up the application.
4. Install additional dependencies from your terminal or command prompt:
pip install pusher5. Download the AgoraDynamicKey Python 3 code from the Agora repository: AgoraDynamicKey
Keep the downloaded folder in a location outside the project folder. Some of the files in the folder will be copied into our project when we’re configuring the back end.
We are going to create the views for the Agora blueprint and import the classes needed to generate the Agora token to establish a call. We will set up Pusher at the server-side as well.
cd app/agoramkdir agora_keyAdd the following code to the views.py file in the app/agora directory:
The data broadcast with the make-agora-call event across the presence-online-channel contains the following:
Using the make-agora-call event, a user can determine whether they are being called when the userToCall value matches their ID. We show an incoming call notification with a button to accept the call. They know who the caller is by the value of from.
We are going to create the user interface for making and receiving the video call with the ability to toggle the on and off states of the camera and the microphone.
The HTML file will contain the links to the CDN for Agora SDK, Vue.js, Pusher, Bootstrap for styling, and our custom CSS and JavaScript.
The index.html file will also inherit a base template, which is used to render the view:
We use Flask’s templating language to be able to reuse some code. As indicated earlier, we inherit a base template named base.html. It has the following blocks:
We have index.css for custom styling and index.js, which is our script for handling the call logic.
Run the following command to create the files from your terminal or command prompt:
cd static/agora/
touch index.css index.js
Add the following to index.js
Add the following to index.css:
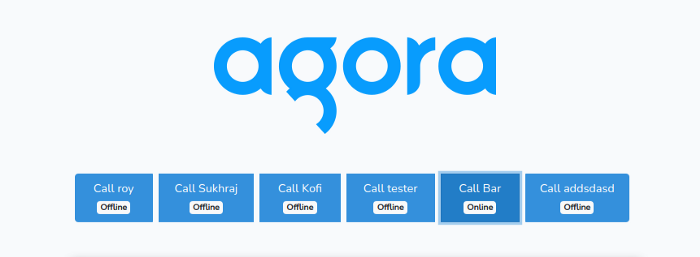
On the video call page (app/templates/agora/index.html), we display buttons that bear the name of each registered user and whether they are online or offline at the moment.
To place a call, we click the button of a user with online status. An online user is a user who is available to receive a call. For our demo, we see a list of users. The user named Bar is indicated as being online. The caller named Foo can call Bar by clicking the button:

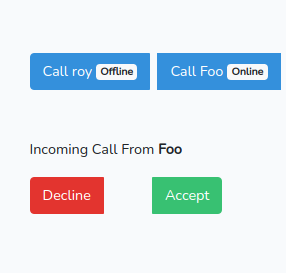
Bar gets an incoming call notification with Accept and Decline buttons and the name of the caller:

From the call notification image above, we see that the caller’s name is Foo. Bar can then accept the call for a connection to be established.
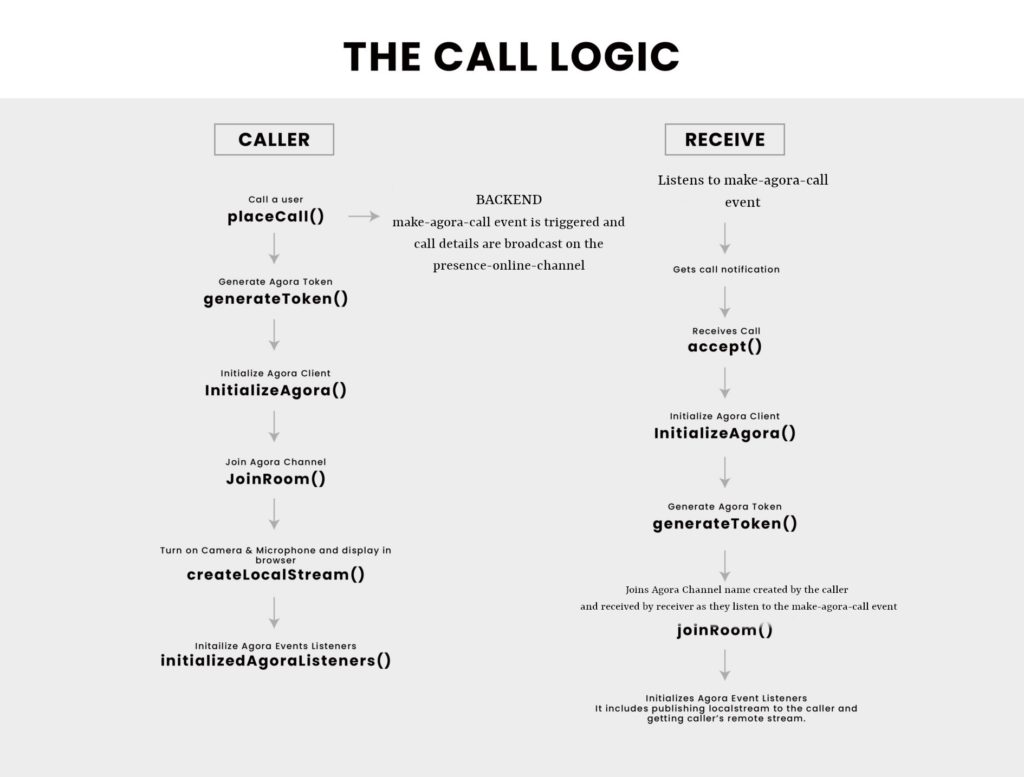
The following diagram explains the call logic in terms of the code:

The .flaskenv file is located at the root of your project folder. Add the credentials you got from Agora and Pusher. Add the secret key too if you didn’t add it during the project setup:
1. Start the Flask development server from your terminal.
flask run2. Open two different browsers or two instances of the same browser, with one instance in incognito mode, and navigate to the registration page: http://127.0.0.1:5000/register.
3. In one of the browsers create four users by registering four times.
4. Login with the account details you just created on each of the browsers from the login page: http://127.0.0.1:5000/login.
5. In each of the browsers you opened, the other users registered on the application are displayed.
6. In one browser, you can call an online user by clicking the button that bears their name.
7. The other user is prompted to click the Accept button to fully establish the call.
To confirm that your demo is functioning properly, see my demo video as an example of how the finished project should look and function: Agora + Flask Video Call Demo
Agora + Flask Video Call Demo
You have now implemented the video call feature in your Flask application! It’s not that hard, right?
To include video calling functionality in your web app, you don’t have to build it from scratch.
Agora provides a lot of great features out of the box. It also helps businesses save development hours when implementing video chat into existing projects. The only thing a developer has to do is build a compelling front end — Agora handles the video chat back end.
Online Demo link: https://watermark-remover.herokuapp.com/auth/login?next=%2Fagora
Completed Project Repository (it is located on the branch named completed in the starter kit):
https://github.com/Mupati/agora-flask-starter/tree/completed
Make sure the demo link or production version is served over HTTPS.
Test accounts:
foo@example.com: DY6m7feJtbnx3ud
bar@example.com: Me3tm5reQpWcn3Q
And I invite you to join the Agora Developer Slack Community.
